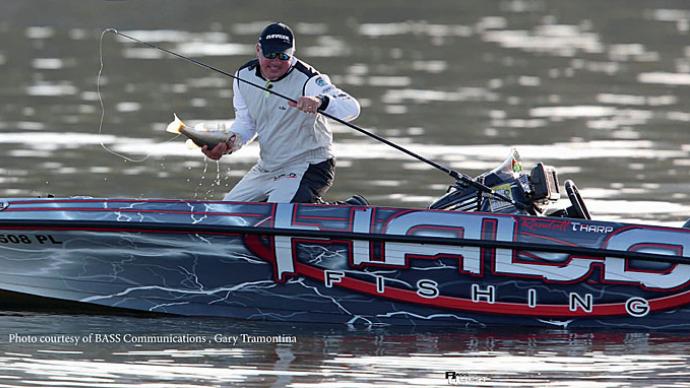
Glenn: There we go. Oh, and he's a puller. Oh, he wants to fight. Come here you. All right, let's see if I can get him out without getting a hook to my face. I didn't bring the net. That's my problem.
Keri: You got him good. He ain't going nowhere.
Glenn: That's a good fish.
Keri: Look at that. One knocker.
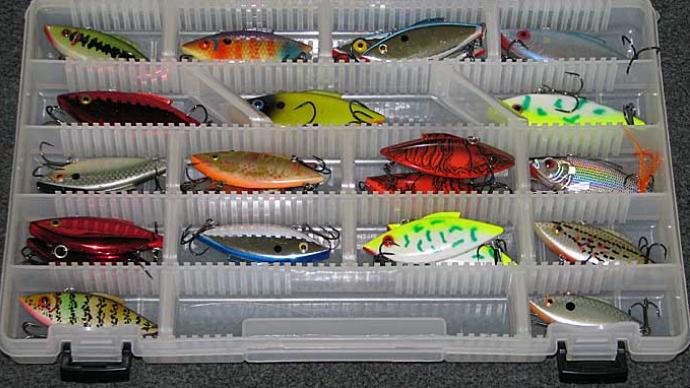
Glenn: Hey folks, Glenn May here at BassResource.com. And today I wanna talk to you about vibrating baits. These are things like rattle traps, the Booyah One Knocker, the Savage Gear Soft Vibe, all sorts of baits like that. What I'm talking about are…look at all these, you know. These are some of my baits. These are the hard baits, the rattling kind. I have...this is a Savage Gear Soft Vibe. If you guys haven't seen this before, this is actually a soft, plastic bait. See that? See how it twists? Yeah. There's no rattles in it. Obviously, it's a solid soft body. But it's another one of these lipless…some are called them lipless crankbaits, vibrating crank baits, however you wanna call them.
But that's what we're talking about today, these kind of baits. I've got one tied on to my rod right now. I've been fishing with it for a while. These are great. These are great year round, actually. They work really well when you cast them in the wind. They fire like a bullet. They don't have a whole lot of resistance, to them. So when it's windy outside, you can cast this and use it when you can't use the other crankbaits. You can fish it at different depths, which is great. A lot of crankbaits you can only go down so deep. These you can go as deep as deep as you want them to. Just let it keep on sinking until it gets the depth you want. You can fish it at different speeds. It's great for covering a lot of water, a lot of different depths to find fish. The key is, of course, when you're fishing them, you have to pay attention to how deep you are and what your speed is when you catch a fish, so you know exactly where they are. But they're great fish finders.
So I'm gonna talk to you a little bit today, first of all, the equipment, how to rig them, how to modify them and that sort of thing. And then, we're gonna go out and show you a few retrieves. They catch a lot of fish for you. So let's start off with the equipment, with the rod.
The rod here I have, specifically, it's a seven-foot crank bait rod. It's a medium power fast-action tip. So you can see it's got a lot of bend, a lot of flex to it, right? That is key. The reason you want that parabolic action is to have a lot to give when the fish bites. These hooks aren't huge. So there's not a lot of bite in those hooks. So the fish can leverage against it and actually pull rip the hooks free. But if that rod's got a lot of bend, a lot of give to it, then every time that fish makes a run for it, that rod gives and allows the hooks to stay in the fish's mouth. So that's really key. Plus, with a parabolic bend like that, you know, moderate action, it allows that rod to load up on the cast and you can fire that bait way out there, which is great when you're covering flats. You need to cover a lot of water, its large expanses of flats and weeds. That's what you want is to be able to get away out there.
Paired with it, I have…this is a Helios rod, I have a Helios reel from Okuma. I love this. The Helios Air has a 7:3:1 gear ratio, I believe. And you want a moderately fast reel. Because you do fish these really slow, you wanna have that flexibility. But when you're fishing really fast, you need a reel that can really crank it in really quickly when you wanna burn that bait back. So a reel that's got over a 7:1 gear ratio is what I like for crankbait fishing. Doesn't need to be a 9:1 or super high speed, but over 7:1 is what I like to have for fishing these baits.
And paired with that, I'm using fluorocarbon line. This is a Seaguar's Tatsu fluorocarbon line 12-pound test. There's a lot of reasons why I use fluorocarbon for this. Fluorocarbon, first of all, has a sensitivity I need to feel the bite because sometimes the bites aren't that strong. They're just nipping, they come from behind and keep swimming with you and you just feel a little bit different cadence in the vibration of the bait. So you need to feel that transmitting through the rod, through the line.
This rod has micro guides on it which are more sensitive than standard guides. But this line, 12-pound test, is about what I like to have because it allows this bait to get down to the depths pretty quickly. Fluorocarbon is dense so it does sink a little bit, lets the bait get down there. Monofilament has a big bend in it. It's more buoyant, has a big curve like this when you're pulling the bait back. There's a lot of extra line in there. You don't have as direct connection to the bait as you do with fluorocarbon.
I don't use braid for two reasons. Braid is buoyant. For the exact reason, it has that bend in it and won't let that bait get down as deep as I want to. But also braid, it's not that great in rocks. It will get frayed. It will get cut up. And you can end up breaking off and losing a bait. Fluorocarbon is more durable in rocks. And it's also very versatile in weeds and wood, and everything. So it's a real good all-around kind of line to use for fishing crankbaits. If I'm gonna throw a heavy cover, I might heavy up a little bit and go to 15 or 17-pound line. But typically, 12 pound is exactly what I want. That works really well for this. Aha.
Keri: You're right. He does not...oh. He's got a little fight left in him, though. All right, you lift this up a little bit. Can you do an easier release and shake yourself off of there for me? Oh, no. I got him.
Glenn: You got him hooked weird.
Keri: He did that to himself. He's hooked really weird. You weren't going anywhere. Somehow you impaled yourself. You slapped at it and it got you.
Glenn: Yeah. Those sharp hooks.
Keri: They're gone. Smallmouth don't mess around.
Glenn: Now, let's talk a little bit about the bait, the interesting thing about these baits. First of all, you know, a lot of people, if you read articles about fishing, especially Rat-L-Traps, if they're older ones, they'll say right away, "Throw the hooks away and put on new ones." Because that was the case back in the day when Bill Lewis came out with all those Rat-L-Traps the hooks were notoriously bad. You wouldn't even wanna use them. They've since corrected that problem. And most baits today…this is the Booyah One Knocker. I just showed you the Savage Gear Soft Vibe. The hooks that come with them are very strong and extremely sharp right out of the box. I do touch them up sometimes. I check every hook point, make sure they're all sharp. And sometimes I touch them up right out of the box. But for the most part, the hooks are really good. I don't need to change them out.
What I do change out sometimes is the split ring. In this case, you can see that I have a snap attached to it. Not a swivel snap or snap swivel. It is just a snap. And there's a reason for that. Now, if the bait comes with a split ring that's round like that, what always happens is the knot inevitably finds that spot between the wires and then those wires rub against the knot, and end up breaking it right there at the knot. So it's round split rings. I take those off and I replace them with a snap.
The other cool thing about a snap is it's really easy to change baits. You don't retie. You can just unhook and put another bait on. You're back to fishing really quick.
But there are some baits that come with an oval snap, and that…I'm sorry, with an oval split ring, and those wires they connect on the side. Well, the knot’s never gonna reach that because it's gonna sit in the curve part of that oval split ring. So those work fine. I don't pull those out. I don't swap those out. I can just tie directly to them. But if it's a round split ring, definitely replace them.
All right, let's talk sizes and colors here for a little bit. There's all kinds of sizes and colors these baits come in. They've got different weights. They've floating, sinking, suspending, the whole nine yards. But if you're just starting now, look, stick by the tried and true, a half-ounce bait. Start with that. That is standard size and chrome colors, specifically, chrome with blue back just like that one. And you get a chrome with black back. And that will work for most of your scenarios. Mostly sunny days works really well. When it's sunny, put on Chrome. A little bit of wind on the water, a bit of chop, like chrome.
This is what I got tied on. It's a little standby, works really, really well in super clear water. Then I go a little bit more natural colors that aren't so flashy. So, for example, here I've got, you know, the Soft Vibe. Comes in like a shad color here. Here's more of a perch pattern, a little more natural colors. They don't get so much of a flash, but they look more realistic. So I'll use those in really clear water.
And then, in cloudy conditions, I'll use something more of a gold. Maybe a gold pattern or a gold chrome with a black back, something like that, that works really well in those conditions. But just stick to those colors and you'll have most of your stuff covered. The only one I would maybe add to it would be like a red color for the spring. In the early spring to mid spring, a red color works really well. Other than that, you don't need to go crazy with all the colors. I showed you a bunch of baits earlier on and that was a...that's a product of me going crazy when I shouldn't have. Don't be like me. Just stick to the basics. You'll be fine.
So that's the setup. Those are the baits. Now, let's get out to casting those and showing you how they work.
Keri: I actually caught a fish and it's a largemouth, on the One Knocker. And look at that. He's got a face full of it, too. Come here, you. Come here, you. I do not want to get hooked. Stop it. I do not want to get hooked. Stop it. Got you. Right there. One knocker. What are you doing over here? All right. Let's let this beast go. A largemouth, I don't know what you're doing over here, but go play.
Glenn: All right. So let's talk a little bit about retrieves, some of the different ones you can use. It's pretty versatile bait, so let me go through several of these. The first one is just a straight retrieve. Now, you would think that's simple enough. But, you know, it's funny how...I think the most common mistake people make with these baits is they reel them in too fast. Just a nice easy retrieve, see this? I'm not reeling really fast. It's a light, small bait. It's easy to overwork it because it does come through the water very effectively. So, a nice slow at a moderate retrieve is the most effective. You tend to get bigger bites when you fish it slower.
So, remember that when you start using it. The thing is, what happens is, after 5, 10 minutes, 15 minutes, your retrieve will start to speed up. I do that. I'm totally guilty of doing that. So got to check yourself every once in a while. When you're out there fishing it, "I'm I reeling it too fast? I'm I reeling it too fast?" Keep asking yourself that. Make sure you're reeling it nice and slow, and easy because you'll catch bigger fish doing it that way. So that's the first thing to do.
The next retrieve is…it's funny. It's actually the opposite of that. But this is really effective when you have submerged weeds such as milfoil, submerged hydrilla. You wanna burn it back. Burn it back right over the tops of that. Now, if the fish are buried up in there, they can't see the bait coming through the water. They can just hear it and they can feel that vibration. You wanna get that reaction strike. And you wanted that to go by them really quick they don't have much chance to think about it. They just strike it. So that you wanna bring it back quickly. Keep your rod tip up so it doesn't deep bury down in the weeds. And just bring it back pretty quick, right over the top. So this is really good when the weeds are, like, maybe two feet, three feet under the water. Perfect way of bringing it right over the top and you get a lot of strikes that way.
The key thing when you’re fishing weeds is that sometimes you'll get it stuck. You know, you'll get it stuck into the weed. I'll tick the tops of those weeds you know, and you'll catch some weeds on the bait. It's really easy to free that, especially if it's hydrilla. Hydrilla will come right off. If you just reel it, you get that weed on there. You just give it a pop. That's all you gotta do. Pop, pop, you know, pop those weeds right off. Milfoil tends to stick like Velcro sometimes, so it may not be as easy to do it that way. But that's how you get the weeds off your lure. And, you know, it's funny, is when you do that, that often elicits a reaction strike. So keep that in mind when you're fishing in weeds.
Another way to use this lure, and this is what makes us so versatile, is the yo-yo retrieve. This works really well when the bite is off, when they're really with lethargic and they don't wanna chase the bait down. Let it fall. Let it sink. And then all that you're gonna do is just gonna reel up and then let it fall again. All’s I’m, here, I'm just reeling up the slack. I'm letting it fall on the slack line. And just point the right tip down and bring it back up. And you wanna bring that rod back down ready for the hooks, the strike, the hook set. But let it fall again on semi-slack line and then just bring it back up again. This looks like a dying bait fish. And if the bite really isn't on, the bass will key on that. They're pre-programmed by nature to attack injured bait fish, and that's exactly what you're mimicking here.
I just had a little bite right there as a matter of fact. That's a little fish I could see him in this is clear water. But that's a great way of catching fish when they're not really actively pursuing baits.
Another retrieve is stop-and-go retrieve. And I don't know why I keep hooking my line on here. But for whatever reason, I am doing that. But the stop-and-go retrieve is one of my favorites because it's an erratic retrieve. It does make it look like the fish is injured or disorientated. All you do is you cast it out there and as you retrieving it in that nice, slow to medium speed, like I mentioned again, just pause, stop, and then bring it up again. And start retrieving it, pause, and then give it a few more cranks, pause. And then, crank some more for a while and then pause for longer. As you can see, I'm doing it erratically. There's no cadence to this. You want it to look erratic. You want it to look disorientated and a disoriented fish doesn't pause, stop, pause, stop, pause, stop. It has to be erratic.
So keep that in mind. A lot of the bites happen when you pause the bait. Sometimes when you're bringing that bait in for a while, just give it a pause anyway. Sometimes the fish are just following it. And suddenly, it stops and it's right in their face. And they have no time at all to react to it, and they usually do, you know, get a bite that way, right at that pause.
One other trick I wanna show you here is when you throw it out, because these baits are so versatile, they can fish a lot deeper than most crankbaits. So this is where it can be really fun to fish. As you cast it out there and let that thing sink. You let it sink, sink, sink, sink, sink. And then when it hits the bottom, all you're doing is you just jig it up the bottom. Lift it up. It looks like the yo-yo retrieve. Except now, we're actually doing it off the bottom. Let it hit the bottom. Let it sit there and then pop it off the bottom again. Give it a harder jerk. It's almost like a jigging spoon. Let it sit there on the bottom, sit in the bottom, and then pop it off that bottom. Reel up that slack and let it flutter back down. A lot of times the bite happens as that bait is falling back down the bottom. So be ready to set the hook.
This is a thing you can't do with the other crankbaits. This is what makes vibrating crankbaits so much fun to fish. They're so versatile. You can do this especially in the winter time when the crankbaits don't work. Throw this in 40 feet of water. Yeah, I do. It's 40 feet. And you can catch fish that deep by jigging it off the bottom that way.
So those are some of the different tricks. I hope those tips help. For more tips and tricks, visit BassResource.com.

