Building a lake is a process. With biscuits, you mix the ingredients, roll the dough, stamp the patterns, then bake at the proper temperature. With a pond, you mix land with maps, plans, clearing, core trench, bulldozers, dam, spillway, habitat. Add water, fish and stir. Next, you go fishing. Last issue, when winter was still reluctant to let go, I asked you to set the objectives for your pond and to get your maps.
Pull them out; we are going to work. You will need a pencil, scale, scratch pad, calculator (reading glasses if older than 43) and rubber boots. Before we get started, peek at your goals list. Keeping goals sharply focused in your mind helps ensure successful planning, then building, your project.
To find a suitable site, start with a topographical map and aerial photos. Aerial photos portray forest, grasslands and farm fields. You can see fence lines, railroad tracks, utility right of ways and most buildings, depending on age of the map. Aerial photos are pictures taken by camera, high in the sky. Topo maps are scale size drawings to add the third dimension missing in aerials..elevation.
Topo maps and aerial photos are available at your nearby NRCS office. Or, do an internet search for "topo" and "aerial." There are plenty of sources out there for maps you need. If you don't know how to read contours on a topo map, talk with the people where you got the map.
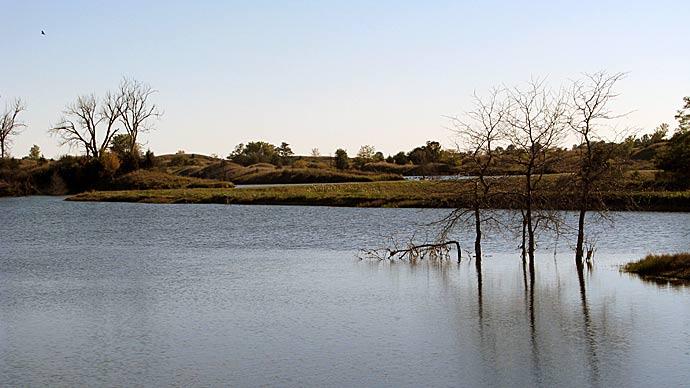
Maps in hand, find your property. Outline your boundaries in pencil. On the topo map, inside your perimeter, look for changes in elevation. Wider lines mean flatter terrain. Close lines indicate dramatic changes in elevation. Green areas are forested, lines are ten feet, vertically, apart. When lines come to a point, that's usually the beginning of a draw, or a creek. Existing creeks are marked-in blue, broken lines. On your map, look for a creek, or several points in a line. That should be the first area to analyze for a dam site.
These maps will be surprisingly accurate, but may not be totally up to date. Don't be surprised to see a map dated in the late 1960's or early 80's that don't show an existing pond, or a building, or anything else manmade. And, when you hit the ground, after plotting and planning with maps, expect the ground to vary slightly from maps, especially the greenery. At first, a topo map might be confusing, but after a few tries, you'll read it like Miss Cleo reads tarot cards.
It's crucial to figure the size of your watershed. By studying your topo map, you can figure out where water flows, based on direction of contours and breaks of elevations at ridges or hilltops.
Pencil a line for your dam, connecting like contour lines. Then, trace the contours upstream, with your pencil, all the way around to both ends of your dam. Voila, that's the proposed shoreline of your new lake.
Now, using a scale, estimate size of the lake, and length of the dam. Compare watershed to lake size. This will determine dam height, if you need a pipe, how wide the emergency spillway will be, or whether to investigate this site further, or find another.
I'll never forget the man from Dallas who owned several fast food joints. Working at this high-pressure pace, he needed time and a place, to relax. The man loved to fish, so he bought land near the Red River between Texas and Oklahoma.
The fellow was thrilled. He could be at his new place in an hour, and fish until sundown, then go home. One problem: He had no pond.
I'll always remember that guy. He was in a hurry, had just spent mucho dollars on land, and wanted to build a pond, quick. I studied maps with him, walked the site and made a proposal. He needed to build a 10-acre lake. For that site, the watershed was too big for a smaller pond. It would cost $32,000 to do it right.
He balked. I walked.
All he wanted to spend was $5,000. 1 hate turning away work, especially when the kids need braces. But, I passed.
I told him to save his money, then build the lake properly. Two years passed. Out of the blue, the guy calls. His message sounded urgent.
I figured it might take two years of hamburger sales to save the money for his perfect lake. Returning his call, I was stunned. He wanted me to help repair the dam of his 2-year-old pond. The fast food mogul had found another earthmover, spent his $5,000, built a 3-acre pond on a large watershed.
A 4-inch rain topped the dam, and tore a huge gap in the structure. The guy was in a bad way, and I felt bad for him. Here was an intelligent man who had made an unfortunate decision. Now, he wanted to do it, again. He wanted me to repair the dam.
"I ain't gonna do it."
The fellow had heard this from me before, so he was puzzled.
"Just exactly what will you do?" I told the guy I would rebuild the dam, and create a 10-acre lake, like should have been built in the first place. Only this time, I would have more preparatory work. This time the guy agreed to do the job properly.
I did the work, all right, and the fellow ended up with a grand lake, but it wound up costing more than $32,000. Lesson learned.
But back to your pond site ... Let's say you find a spot worthy of your investigation. Get your boots. It's time to get in the country.
On your land, locate the spot you identified as a candidate. Get a feel for what kind of dirt you have -- sandy, loam, clay, silt? Big rocks, surface, layered?
Are there any utilities poles or pipelines in the way? Does some of the timber need to be cleared? Walk the proposed site and look for items that don't show up on a map.
Years ago, I walked a site near Lake Ray Roberts, north of Denton, TX. The place looked like a great place to build a lake. The test holes we dug showed good clay, two feet underground. But, as we began to build the lake in the lowest point, we found an old, silted in creek bed, full of tree limbs, tree trunks and a model T Ford fender and headlight.
Later, we learned this land was an abandoned farm, fallow for the last 75 years. Bad farming practices led to heavy erosion and siltation of a deep creek. There was 12 feet of silt, mixed with farm junk, in the site. Just lovely.
We had to excavate the dump and fill the hole with good clay. Only then could we build the dam. Due to these unforeseen circumstances, costs ran well above budget. I had bid the job, so I got stung in the back pocket.
Here was the lesson we learned: The larger the watershed area, the deeper silt to be found in the lower spots.
There may be 5-6 feet of silt or some other undesirable material for dam construction. Here's the second part of this lesson. The bigger the drainage area, the bigger the core trench required. Set your budget for it.
If there's a creek, notice how much water is flowing. Check soil types, topsoil, sandy, tight clay. If water is running in a dry season, that should send a red flag. Be aware there's probably a spring or high water table, and the contractor will need to work around it. If it's wet season, and your creek is dry, beware, soils may leak. Read the creek.
Next, it's time to shoot the elevations. Up until now, you have only spent a few dollars and some time looking at maps. Hire a surveyor, dirtman or pond consultant to shoot the grades. Maybe you can rent a transit and do this yourself.
Look for reference points. Find the elevation of the limiting factor, and use that as a reference. What's your limiting factor?
One client of mine bought property then found out that, to build the "perfect" lake on his best site, he would have to back water 20 feet onto a neighbor's property. To keep water off the neighbor, his lake elevation would have to drop 3 feet vertically, shrinking the lake from 6 acres to 4. He bought the neighbor a fancy, spiral-cut ham, a bottle of whiskey, and went calling. Back he came, with a permission letter to inundate a bit of his neighbor's property. He moved forward with his new lake.
Find the best dam site, then stake the center line where your dam will lie. Use your limiting factor reference point for water level. Top of dam should be four feet higher than water level. That's called 'freeboard.' Now you have a mark at water line, another one at top of dam.
Next, go to the deepest part of the creek, and find out how much fill is needed to the top of the dam. Shoot the same elevation on the other side of the creek bank, and find the top of dam again. With those marking elevations and shirttail engineering, we get a rough estimation of yardage in the dam.
Here's how to calculate the approximate number of cubic yards of dirt in the dam: Multiply the average height of dam by the average width times the length. This will give you cubic feet of dirt on top of the ground, to build the dam. Then divide by 27, because there's 27 cubic feet in a cubic yard.
Cubic yards is the measurement most earthmovers use to calculate their costs, which are passed on to you as the price of the project. This is the time to do the job right, or back off entirely.
I'll never forget Jim Tatom's property in north Texas. Jim and his bride spend summers in Montana, and winters at the ranch in Texas. Jim is an avid fly fisherman, and wanted to create the perfect Texas fly fishing take, with giant bluegills and hearty bass.
On our first visit we toured a deep, wide canyon, maybe one of the biggest canyons in the region. With lots of deep water, beautiful, rugged shoreline, it was a model spot for a lake. It is close to my house, the clients are good to work with, so it was everything a bulldozer guy could ask for. But the longer and deeper we looked, the worse the site became.
There wasn't enough good clay material around to fill the bed of my pickup. Finally we had to face the fact this lake wasn't going to happen.
The Tatoms were sick. I was, too. That job would have meant shoes for the Otto children.
Jim kept looking along the canyon. Several hundred yards upstream he found a suitable site, with plenty of good clay. So, even though we had done our homework, found the best site on the maps, then walked the area, our "best" site wasn't even close. The alternate site created a much smaller lake, but the dam holds water, the lake is beautiful, and the Tatoms are happy. Not bad for second-best.
Read your maps, shoot elevations, check your soils. Jump those hurdles, and it's time to take the next step. Design the lake bed, study the proposed shoreline, and keep learning your dirt. Next issue, we'll take a peek at core trench, projecting costs, and shoreline design.
The author, a Pond Boss Field Advisor, may be reached at Otto's Dozer Service 1-800-882-DIRT
Reprinted with permission from Pond Boss Magazine