What knot do you tie? It’s a question that seems to come up off the water more than on it. This is odd because knots tie anglers to bass.
The knot you use is most likely the one you learned from the person who taught you to fish. And as you added techniques and lures to your bass-catching arsenal, your knot of choice probably didn’t change. It has served you well, but using knots tailored to different situations will help you catch more bass.
These five knots cover nearly every bass fishing situation. They are easy to use and won’t let you down.
Alberto Knot
Joining two pieces of line, especially if they are different pound tests, can push the patience of even the most saintly angler. The blood knot has been the standard for that situation over the years. But it requires wrapping two tags in different directions and then bringing them back through a middle loop from opposite directions. It’s beautiful when it comes together tight and strong. But you’re left pleading for a better way when it doesn't. Lucky for you, there is one.
The Alberto Knot wraps one tag and works well with different line sizes. It’s perfect for attaching new line to the backing on your reel. Bassmaster Elite Series angler Josh Bertrand uses it to attach fluorocarbon leaders to braided lines, from light-line drop shots in deep water to heavy cover frogging in clear water. He likes it because the two tags lay flat against the main lines, which means the knot moves through line guides without a hitch.
How to tie the Alberto Knot:
- Double the thicker of the two lines over itself, at least 6 inches.
- Pass the thinner line through the loop created by doubling the thicker line, pulling through at least 6 inches.
- Wrap the single line around the doubled-over line seven times.
- Go back over those wraps in the opposite direction with seven more wraps.
- Put the tag end through the original loop. Moisten the knot and draw it tight. Trim the tag.
Loop Knot
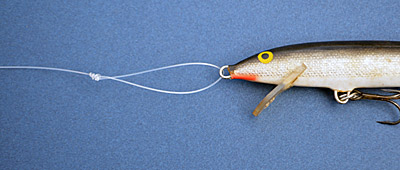
Tying a knot directly to a lure that wobbles, such as a crankbait, robs some of its action. Snaps and split rings can return it, but their weight affects light-weight lures such as balsa minnow baits and finesse crankbaits. Enter the loop knot, which lets lures move without weighing them down. Famed fly angler Lefty Kreh created this version, and it’s strong enough to handle saltwater fish. The loop’s size is easily adjustable until the knot is drawn tight.
How to tie the Loop Knot:
- Tie an overhand knot in the main line, leaving it open about the size of a quarter and the tag about 6 inches long.
- Run the tag end through the eye of your hook or lure and then through the loop created by the overhand knot.
- Wrap the tag five to seven times around the main line above the loop, then run it through the first loop again. Adjust the size of the loop.
- Moisten the knot, and draw it tight. Trim the tag.
Snell Knot
Do you pitch and flip Texas-rigged soft-plastic lures often? Then you need to try a Snell Knot if you haven’t. It’s the same knot on the pre-rigged hooks used for live bait fishing. It ensures that your line and hook shank remain in a single plane when setting the hook. That transfers all your power to the hook point.
There are several approaches to this knot. This version is probably the easiest to tie, though it will take some practice to figure out where to put your fingers. Using an extra-long tag end helps.
How to tie the Snell Knot:
- Insert the line through the eye from the point side, and double over to form a loop.
- Pinch the two lines and hook at the keeper or about 3/8-inch from its eye. Wrap the tag seven times around the shank and main line. Stack the wraps one in front of the other, moving from your fingers to the eye of the hook.
- Push the tag back through the loop you created in Step 1.
- Moisten the knot and pull the main line and tag, which are now facing in opposite directions, to tighten. Trim the tag.
Palomar Knot

At an outdoor show, one cold Upstate New York winter when I was much younger, I walked up to the booth of a prominent line manufacturer. Its representatives offered the chance to test your knot against a machine that recorded the force needed to break it. So I tied a Palomar Knot — the only one I knew at the time — in 8-pound test. The machine broke at more than 12 pounds.
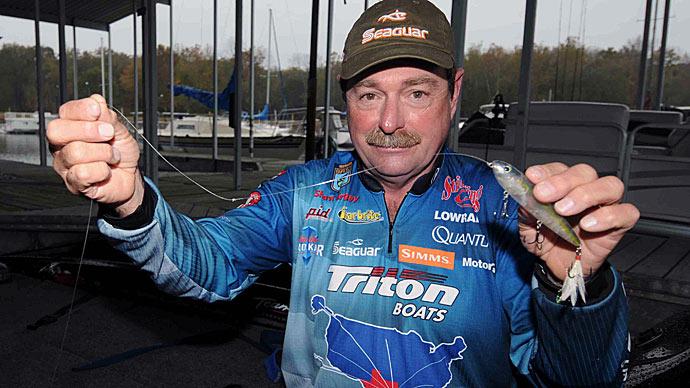
If you’re searching for a knot that’s easy to tie and strong, look no further than the Palomar Knot. Those traits make it all the stranger that more anglers don’t use it. But don’t count Bassmaster Elite Series angler Dave Lefebre in that group. The Erie, Pa., angler, who spent 13 years on the FLW Tour winning almost $2 million, ties a Palomar Knot nearly every time, regardless of line type or pound test.
Lefebre said the Palomar’s strength is only realized when correctly tied. That happens when the two wraps inside the eye sit flat next to each other.
Long, slender lures, such as jerkbaits, can make a Palomar Knot tricky to tie, but it can still be done. Make sure the loop is larger than the lure, and you won’t have a problem.
How to tie the Palomar Knot:
- Double the line over 8 inches, and push it through the eye of a hook or lure.
- Make an overhand knot, keeping the loop in the tag end large enough for your lure to fit through.
- Drop your hook or lure through the loop.
- Moisten the knot, and pull it tight, making sure wraps around the eye lie flat. Trim the tag.
Improved Cinch Knot
This may be the most popular knot in bass fishing. But if you often tie a Palomar, you might have forgotten its details. It also is called the Trilene Knot, in homage to the name brand of line.
It’s strong, and the way it’s tied makes it useful for lures with multiple treble hooks, which can be challenging to navigate through the Palomar’s loop. It also is useful when assembling a Carolina rig when you can’t easily tie a second Palomar on the swivel. Versions include one with a second loop near the eye and one that has three tag ends. This is the time-tested version.
How to tie the Improved Clinch Knot:
- Run the line through the eye of a hook or lure.
- Wrap the tag end around the main line seven times.
- Push the tag through the loop you created between the eye and the first wrap.
- Run the tag back through the loop that you just created.
- Moisten the knot, and pull it tight. Trim the tag.
Tips to remember
Regardless of which knot you tie, there are some general approaches to remember. These ensure your knot stays tight and doesn’t weaken the line.
Don’t trim the tag end — or ends — too close to the knot. Under heavy shocks, such as a hard hook set, knots can slip a bit and then tighten further. Braided line seems to slip more than monofilament and fluorocarbon. A short tag, an 1/8-inch at most, will give it the running room it needs. Longer tags, especially with heavy-pound test monofilament or fluorocarbon, can collect bits of weeds and other debris, fouling your lure. They also make Texas rigging soft plastics more difficult.
Moisten the knot with a bit of saliva before pulling it tight. That eliminates friction, creating heat that damages the line while pulling it snugly. Dry line also can dig into itself, especially if you’re tying a monofilament or fluorocarbon leader to braid.
Tighten knots with a smooth pull. There’s no need for a sharp tug afterward. Once you pull it tight, it’s tight.
If drawn down properly, a knot won’t give out. When you break a lure off and see that little curled section of line at the end, it’s more than likely that the knot came untied rather than broke. The line usually breaks from wear and tear within the first foot or so of the knot. So when you retie, you are removing that line section rather than creating a stronger knot.
Pay attention to where the knot sits on a lure’s split ring. Position it 180 degrees from the opening. The wire’s ends are sharp enough to cut the line.
Don’t skimp on the tag end. More length makes all knots easier to tie. You might waste more when you cut off the longer tag or tags, but wrapping short sections will test your patience.
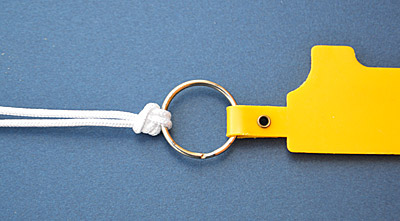
Like most things in life, perfect knots come from practice. A shoelace or the string from a hoodie and a large split ring, such as the ones used for keys, are perfect for learning. The larger diameter string is easier to handle for fingers that haven’t learned what to do. Pull the knot snug so you know you tied it correctly, but not so tight that you can’t untie it. It’s an excellent activity while watching TV or waiting for the ice to melt if it’s freezing where you live.


