First, the Huddleston trout (the ROF #12's and #16's) already come pre-rigged with a large, single jig hook in its back, so why go through all this trouble to give them an "after-market" rigging?
For starters, the ROF #5's are not pre-rigged with the jig hook in the back. Yes, all of the Huddleston trout have a ring in the belly, which will allow for the attachment of a split ring, and any hook you want to use. However, this hook placement will cause a much higher percentage of "bottom lip hooked fish" and, even worse, a much higher percentage of "gill hooked fish," which, when we stop to consider that this lure is primarily used for trophy bass, gill hooking is not acceptable.
Although the pre-rigged jig hook will often hook them well, it cannot move independently from the lure. Therefore, if the lure gets yanked in one direction, so does the hook (possibly with considerable leverage), which can cause more damage to the fish's mouth, a ripped-out hook, and a lost fish!
So then, the following rigging method is something I have designed and thoroughly tested for more than two years now. Using this method means:
- The hook is replaceable should it become dull.
- It can be used on the Huddleston ROF #5's, which are not pre-rigged.
- It usually gives very solid roof-of-the-mouth and top-lip hook-ups.
- After hooking a fish on this rig, the single hook buried in the back of the Hud usually pops free, allowing the lure to swing in any direction it wants to, but leaving the line in a perfectly straight angle from the hook, all the way to your rod tip, and
- Ahhhh, geez..... This might be the most critical aspect of this whole rigging idea! But come on, guys... I can't give it all away! You will have to try this rigging for yourself to figure out the potentially huge benefit of #5 :-)
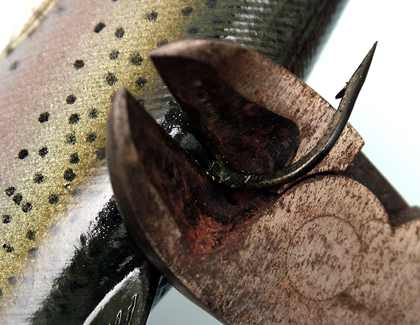
Okay, here we go. Get a large, heavy-duty pair of dykes for this. Place the hook deeply in the 'V,' pressing down the soft plastic around the hook so that when you cut the hook off (but please read #2 before doing so !!!), the soft plastic will pop back up and bury the jagged edge.
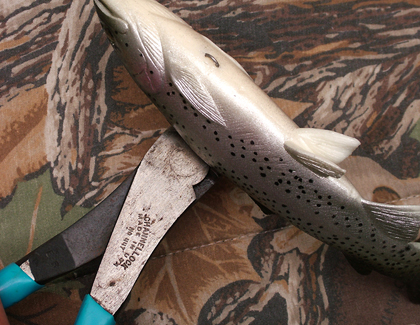
IMPORTANT!!! Make sure to point the hook away from your face when cutting it! This hook point can fly, and you might need those eyes for something besides rigging Huds!
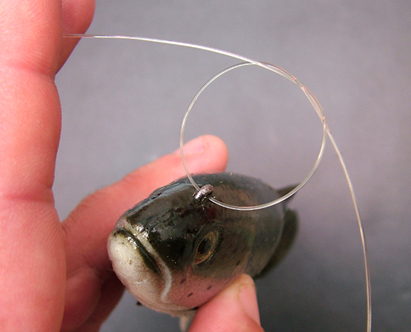
(note, this is only necessary on the ROF #12's and #16's, which do not have a solid ring for the line tie eyelet)
Granted, this line tie eyelet forms a 'closed loop.' However, under a heavy load (like from a big bass going ballistic), the braided dropper loop can squeeze through the back of the eyelet, causing you to lose a big bass with the hook still in it!
To significantly reduce the odds of this, tie a piece of heavy mono (30 or 40lb test) in a couple of granny knots through the eye.
(note; I have lost one good fish and narrowly saved another due to the braided dropper loop pulling out of the back side of the Hud eyelet..... But I have not lost one since I started using the mono granny-knot loops, which will not flatten like braid, and squeeze through the gap)
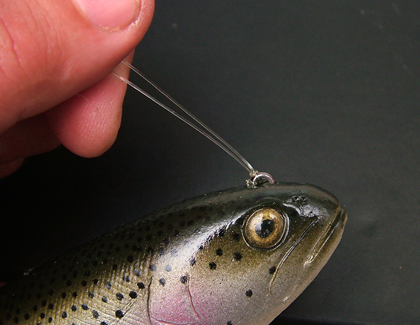
Cinch down tight......
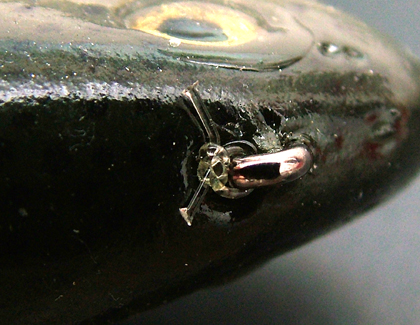
..... and trim off close (this knot is much tighter and closer than it appears in this super-macro photo)
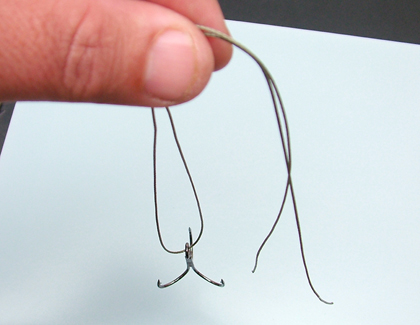
Thread a 20" piece of heavy braid (which I will describe later) through a 2/0 Owner ST-36 hook. (hook is much larger than it appears in this photo)
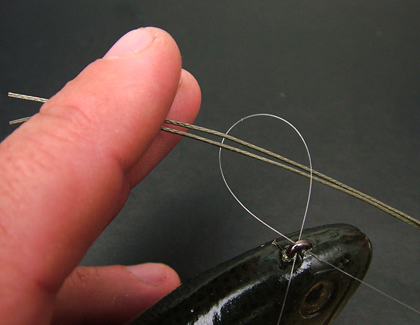
You will need to use a piece of 4 lb mono (6 lb might work) to pull the double end of your heavy braid through the eyelet on the Hud.....
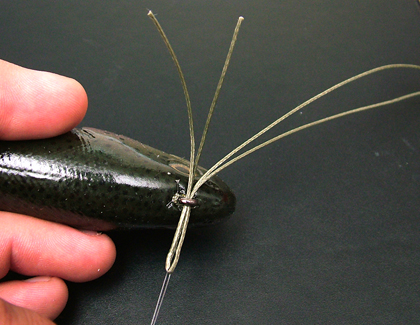
.....like this.
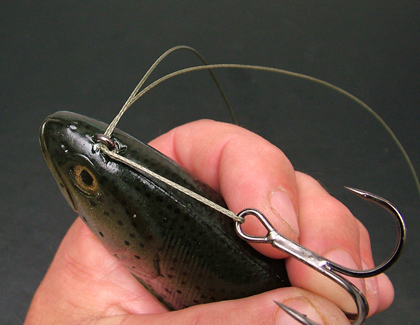
The space between the Hud eyelet, and the treble hook eyelet, will need to start much shorter than you might think..... as once the double clinch knot is tied, it will get longer as you cinch it down. Try starting with about 1 1/4" between the eyelets.
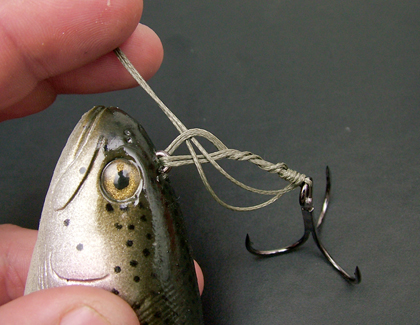
Now tie a simple double clinch using 4 or 5 wraps.
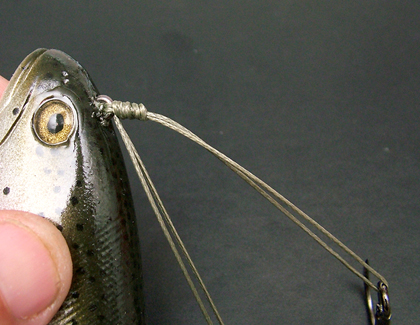
Note how cinching this knot down has dramatically increased the distance between the Hud line tie eyelet and the eye of the treble hook.
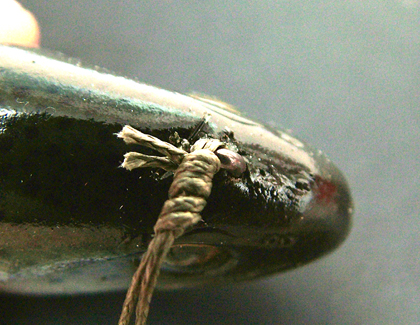
Trim closely (again, this knot is smaller and trimmed closer than this super-macro shot might suggest, but you will see it finished, from an average distance, soon)
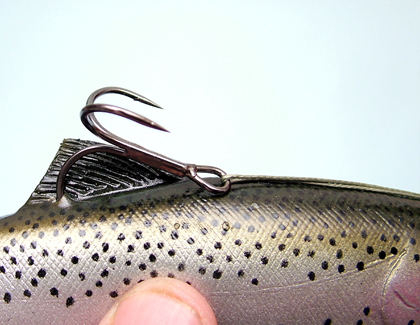
This picture shows precisely how far the hook should drop back and where it should be inserted into the back of the Hud.
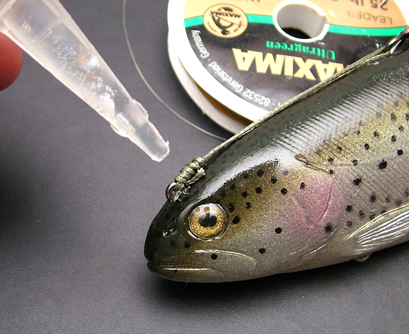
Push the knot down snuggly, facing rearward. Remember, the monofilament granny knots are underneath. Put a drop or two of superglue on the knot and tag ends of the heavy braided dropper loop.
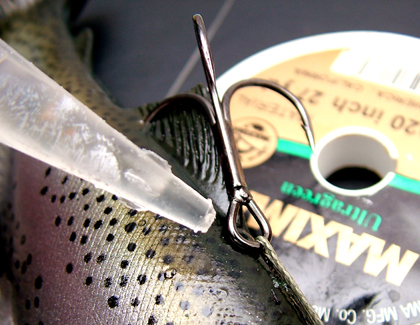
.... then one drop between the hook eye and where it meets the back of the Hud, right at the front of the dorsal fin......
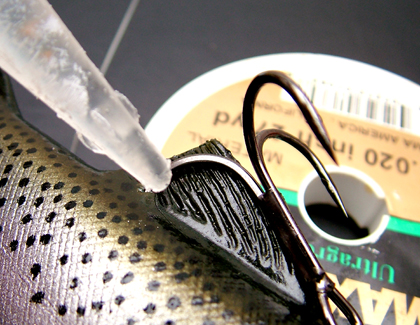
....and one more drop where the bottom hook enters the Hud. (note: you can use a drop between the curve of this hook and the dorsal if you have to, to make it ride straight up, but if rigged correctly, you shouldn't have to..... and also, the dorsal tends to get pretty destroyed when it's glued. Then after hooking a good one, which will rip the hook out of the Hud, more than half of the time)
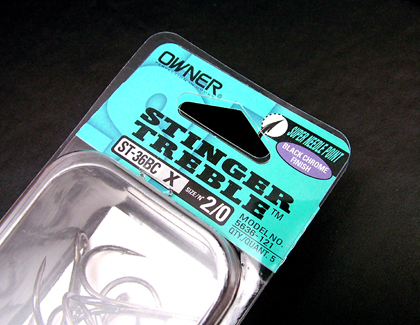
This is the only hook I would even consider.
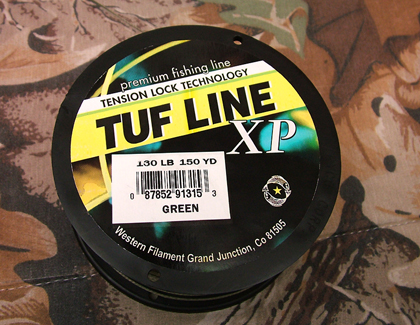
One spool of this will do about 200 Huds...... Or any number of other home projects you might come up with :-) Scary strong stuff, but amazingly easy to tie.
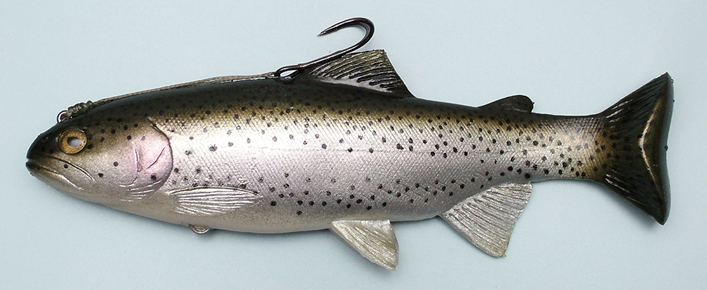
Ta Da! Ready to stick and land, any monster bass that happens to eat it! How pretty is this, huh? :-)
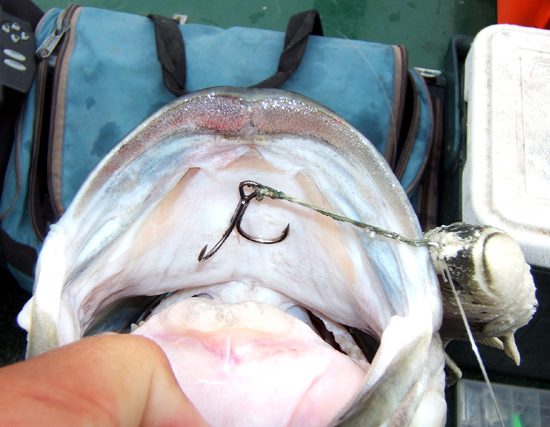
.....just like this :-) You can't tell that this Hud has been eaten more than a couple of times, can you? Yea' buddies! It's a beautiful thing :-)
This rigging description will help you to land a bunch of big fish on the Huddleston trout lure. It certainly has for me :-)
Great fishing to all,
Fish Chris


