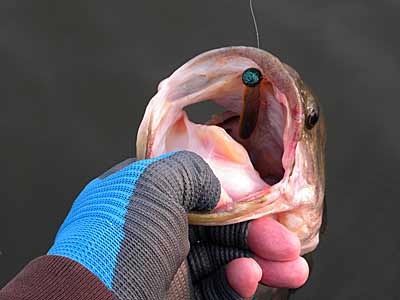
I have a simple question for all of you, raise your hand if you fished a Ned rig last year? Why are all of you raising your hand? That's simple. In today's environment, if you have not fished a Ned rig in the last year or so, you have isolated yourself from all that is going on in the bass world.
Ned rig fishing is a topic that has received plenty of coverage these last few years and is well deserved as it catches bass. I bet you're saying to yourself, what another Ned Rig article? Well, I plan to take a different angle with this article. There have been many articles just scratching the surface of Ned rig fishing. I plan to dig deeper into Ned rig tackle and tactics and reveal the advanced secrets the pros keep close to themselves. We will go in-depth with Ned rigs and break down all the angles to help put more bass in your boat, even when the Ned rig bite gets tough.
Basic Ned Tactics
The Ned rig caught traction off a jig head that was popular in the Upper Midwest. Connie Peterson was the owner of Gopher Tackle, a tackle maker in Minnesota that created a mushroom jig head back in the '70s. That started a local tactic of taking a 1/8oz mushroom-head jig teamed with a 4-inch ringworm to catch cold front and pressured tournament bass in significant numbers.
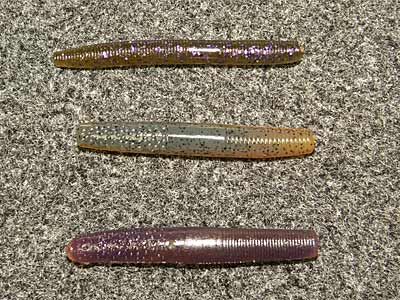
Ned Khede soon took notice of this jig head and played with different plastics producing today’s version of what has been named Ned rig. His most infamous feat came from catching 232 bass off a single ZMan’s ElaZtech worm in a single day of fishing, which vaulted the Ned rig into the limelight.
Plastics companies have since jumped on the Ned train and produced more plastic baits to feed the demand. Same with jigs heads. Tackle companies have produced jig head choices giving fishermen a more comprehensive selection.
That snapshot brings us to the current conditions, so what can you do to advance your Ned fishing this season? I incorporated a few adjustments into my Ned fishing last season, showing improved success across the board.
Your Ned Jig Selection
What started with a Mushroom Jig Head created a swell of more Ned jigs making their way to the market. Take a closer look at the Ned jig heads being offered now, and pick a few to expand your selections. I'm a big proponent of making my jigs to make slight adjustments that I can't buy from manufacturers or save money.
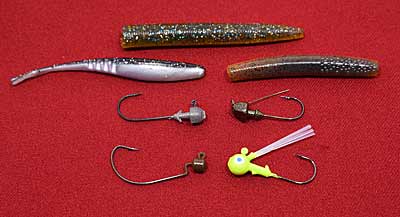
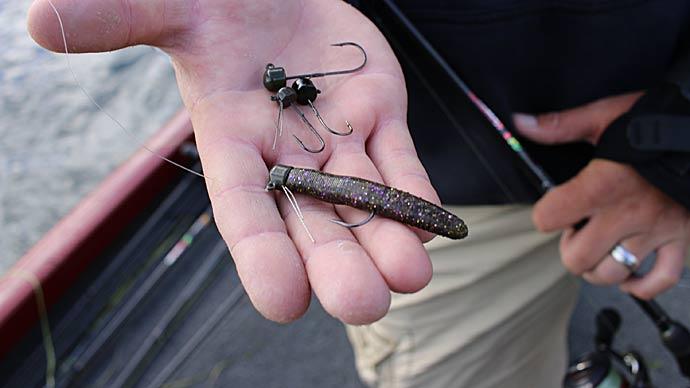
Three jigs I use for my Ned fishing are made from Do-It Molds. First up is the Worm Nose Jig. It's a Do-Its copy of the Mushroom Jighead. I tweak this jig by upsizing the hook for better grabbing and holding power. Next in line is the Do-It Midwest Finesse Jig. This jig is a variation of the Worm Nose Jig. The Midwest head will stand up when equipped with an ElaZtech or other Ned worm bait giving the bass a different look. It's critical when fishing in pressured lakes or during cold front conditions.
The last jig head I carry in my Ned jig box is a simple weedless ball head jig head size 1/16oz to 1/8oz. I use this jig head to expand my Ned presentation opportunities to include weeds, simply not hard bottom areas. I was under-sizing my other Ned jigs, trying not to bury them in the weeds, creating wasted casts. I have increased my opportunities by rigging my Ned plastics on a weedless jig head. I can get this jig through the weeds better than other Ned jigs.
When fishing this weedless jig presentation, I under-size the jig on purpose and use a retrieve that I have in the past while fishing a 4" ringworm. I rig a 1/16oz ball head jig with my Ned plastics choice and make a cast up into the weeds. If my falling Ned rig does not generate a strike, I'll let the bait settle on top of the weeds. My goal here is not to bury the jig too far into the weeds so I can't get it back out again with a rod snap. I can often trigger strikes by snapping my Ned rig jig off the weeds. Sometimes bass will hit as it falls back to the weeds.
Expand Your Plastics
With the vast popularity of the Ned rig fishing, today’s bass are getting a repeated glimpse of it, in some cases daily, so the newness of the bait has quickly worn off. To stay in the game, you'll need to adjust your presentation. One of the best ways is to open your plastics box and expand the number of baits you're using for Ned rig presentations. I have added a few new shapes in assorted sizes to my lineup of Ned baits.
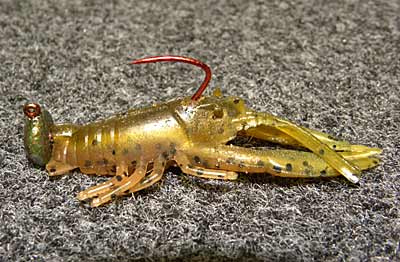
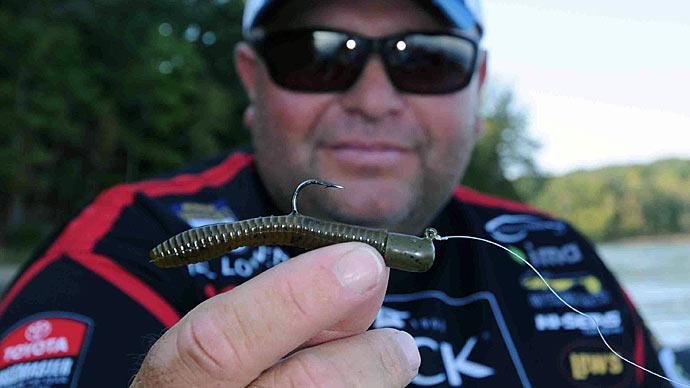
Examples of different Ned rig sticks I have added 3" and 4" stickbaits, and I have also taken 5" Strike King Zeros and cut them in half to offer an ElaZtech bait in a different shape and size. I have done the same thing with 6” Stickbaits because they have a bigger profile than other stickbaits being used.
Other baits that I have included are a 4" Big Bite Jerk Minnow and 3” D&J craw. I rig the D& J craw two separate ways, first in a typical rigging by threading it onto the jig hook. I fish this bait is to add a piece of foam in the belly pocket, making it stand up on the Midwest jig head. It's something the bass don't get to see a lot of and has become one of my go-to’s when fishing tough conditions looking for bites.
Another bait that I have turned towards is a Big Bite 2.5” Salt tube. It's the sleeper bait in the group. I bet you fish bigger tube versions but may not even have a bag of smaller tubes in your tackle box. So pick up a few bags and add this sleeper to your Ned arsenal.
Equipment Tweaks
We all have favorite rod setups that we use for specific techniques. However, there are a few adjustments that you can make to put more odds in your favor when bite conditions call for it.
My standard Ned rig setup is a 7-foot Denali Lithium Pro medium-action spinning rod with a Lew's Custom Pro size 20 spinning reel spooled with 12lb Sunline Asegai braided line with a 4-foot Sunline Maboroshi 8lb to 10lb FC leader. My main spinning setup for Ned rigs and many other finesse tactics that I fish. There have been times when I had to adjust this a little to match the fishing conditions.
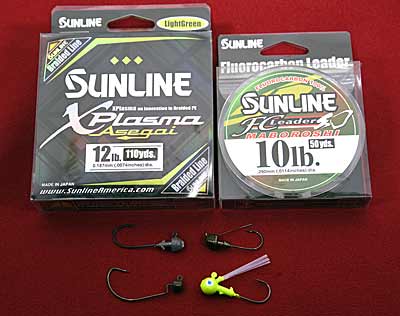
An example would be fishing under severe cold front conditions with braided line when you can feel the bass pick up your bait but drop it before you can set the hook. Just as you can feel the bass, they can feel you with your braided line in these conditions. That is why they are dropping the bait before you can set the hook.
The first move I'll make is to change my fluorocarbon leader to a mono leader. It's a simple, quick adjustment. Monofilament has the most stretch of the three lines (Braid, Fluorocarbon, Monofilament). Hopefully, it will be enough of a line adjustment to have sensitivity and keep the bass holding onto the bait, so I can get a chance to set the hook.
I'll swap my reel spool to a straight fluorocarbon line if my mono leader adjustment does not produce. This change will incorporate more stretch into my line sparking hopes that the bass won't be able to feel me, and I'll get a chance to set the hook.
I have had days when these line adjustments have made a significant impact and other days that no matter what I did, I struggled to catch and put bass in the boat because of severe high-pressure conditions. But then again, that is why they call it fishing.
I hope these Ned tactics give you some ideas you can use on the water to help put more bass in your boat this season when the bite gets tough. Open your plastics box and experiment, think outside the box, and throw baits that you think will trigger bites. Expand your jig heads to fit the waters that you're fishing. By just giving the bass a fresh look, you can get more bites during your day on the water.
BassResource may receive a portion of revenues if you make a purchase using a link above.
