Ed Franko recalls when he was a kid, his dad would love when Ed would spray paint his lures.
Throughout the years, Ed Franko also dabbled with a “pet” topwater color (yellow) that produced numerous bass in the spring. “I never could find that color I wanted, so I would buy a can of spray paint and spray the lures myself and go to town with those,” Franko says. “They were rough looking, but they worked.”
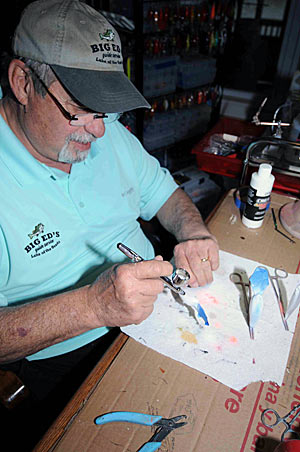
When the Lake of the Ozarks guide was laid up with back problems three years ago, Franko decided to try painting lures with an airbrush his wife bought. “It started as a little hobby, and the next thing I knew, it grew, and it grew, and it became a monster,” he says. “It is an addictive habit.” The owner of Big Ed’s Guide Service estimates he now sometimes spends as much as 10 to 12 hours a day painting lures for him or others.
The Missouri angler offers tips to help those interested in creating unique paint jobs on their lures.
Equipment
“You have to have a good airbrush,” Franko says. He notes air brushes range in cost from $29 to $300; the Iwata airbrush he bought from Amazon cost slightly over $100. An air compressor is also needed for lure painting.
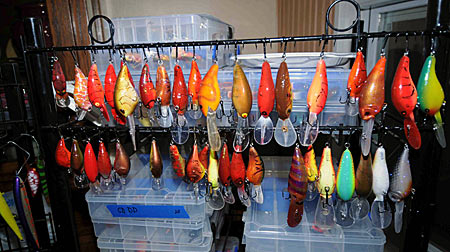
Franko buys water-based Createx paints from Amazon or Hobby Lobby and estimates he has about 40 colors. The paints usually cost him about $4 for a 2-ounce bottle or $14 for a 16-ounce bottle. Franko usually buys the larger bottle for black and white paints, the two colors he uses most often. Franko applies a clear coating of two-part epoxy or Clear Diamond Finish for the final coating.
Other essential items for painting lures include a heat gun or hair dryer to speed up the drying process; split ring pliers; plenty of clamps and forceps; 400 grit sandpaper; good lighting: a shop vacuum, and “a ton” of paper towels. Franko also uses a large piece of cardboard that he sits on his table in case of paint or clear coat spills.
The guide suggests buying lure eyes and fish scale patterns from suppliers such as Barlow’s Tackle Shop, Dinger Custom Baits, and Predator Bass Baits. He also buys lure body blanks from these suppliers for painting.
Painting Process
“I am definitely not an artist by any shape or form, but I just like to put things together,” Franko says. “It is all trial and error.” He notes much of what he has learned comes from watching numerous YouTube air brush lure painting videos.
The hardest part of the process for him to learn was mixing colors and how to make lure colors fade. “Basically, you just mess with things and see which way you like to make them, and then you just continue to put different colors and patterns together,” he says.
Franko paints freehand without the help of patterns and admits he has trouble painting in straight lines. He notices his lines are sometimes straight, and other times look like “a heartbeat pattern.”
The first step in the painting process is applying a white base coating. Franko usually paints four or five baits at a time to avoid frequently cleaning paints out of his airbrush.
Franko’s next step is to start from the bottom of the lure, add the lighter colors, and then work to the top of the bait with darker colors. He finishes the paint job with the darkest colors because those are the hardest to clean out of the airbrush. The time it takes for him to paint his lures depends on whether he wants his paints to blend or be applied separately. If he wants the paints to blend, he applies each coating while the paints are wet, but he lets a coating dry first before applying another color if he wants separate colors. He estimates most of his paint jobs take about 15 minutes.
If he makes a mistake during this step, Franko can wash off the paint job before it dries with soap and water and starts over. If he likes what he sees, Franko heat treats the lures. He estimates it usually takes 30 to 40 minutes for the paint to dry.
After the lure dries, the final step for Franko involves dipping the lure into the clear coat and hanging it up to dry. The clear coat drying process takes about 24 hours.
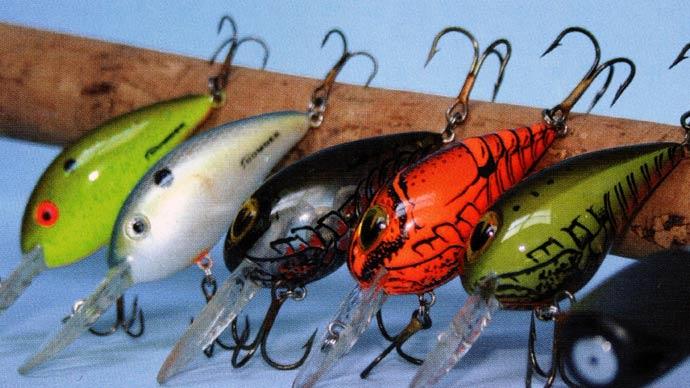
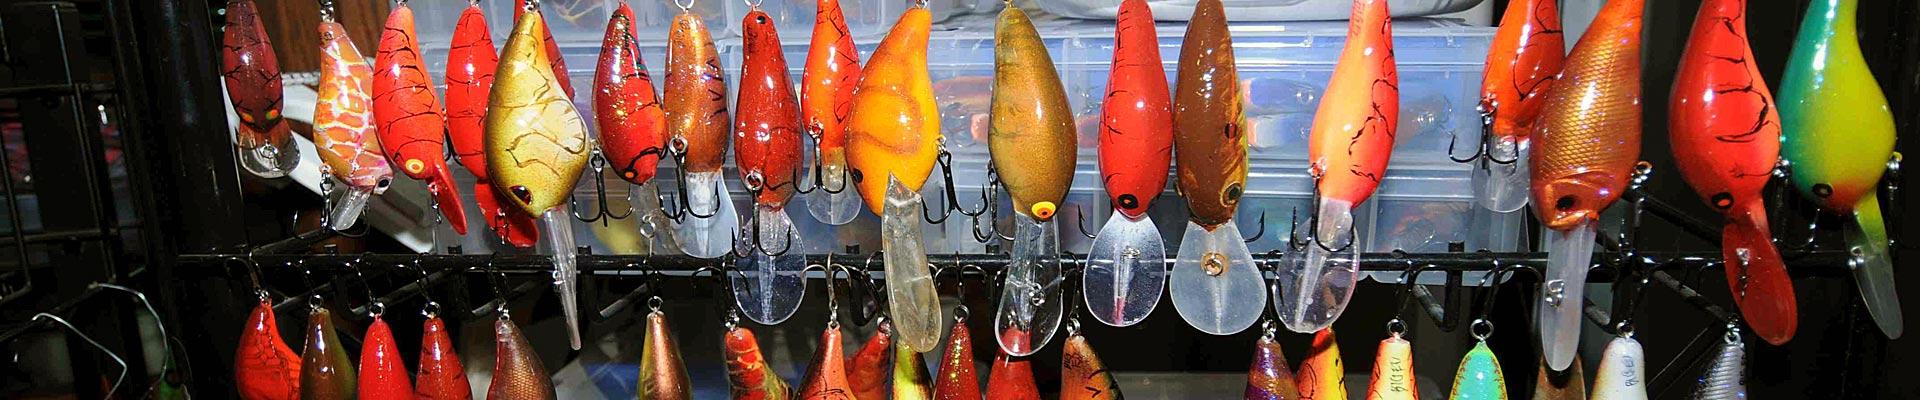
Franko lists square bill and deep-diving crankbaits as the easiest lures for him to paint because the baits have compact, fat bodies that are easy to handle. He also paints several hard plastic jerkbaits and dabbles with topwater lures. The colors he most frequently paints for customers are red crankbaits and Pro Blue jerkbaits.
The guide’s advice for novice lure painters is to take their time, watch the lure painting videos on YouTube, be open-minded and be prepared to make mistakes.