Fishing is a no-no when trying to learn electronics.
David Poort preached this tip when he conducted seminars on fishing electronics for Dunkin-Lewis, a sales rep agency for Minn Kota and Humminbird. He went to work for Dunkin-Lewis more than 24 years ago and conducted seminars on electronics to promote Humminbird products at trade shows and dealerships throughout the years.
Today’s electronics are more sophisticated, with units featuring 2D sonar, down imaging, side imaging, and mapping. Still, Poort believes the electronics are more user-friendly “by leaps and bounds” than the units were when he started in the business. “The adjustments to change the sensitivity or the contrast are just one or two touches of a button now,” he says. “You would have to go through three or four menus to get there, and you were not sure what you would still get because you didn’t have a digital readout.” He notes color in graphs has also made it easier to see adjustments you are making to the screen.
The electronics expert notices that novices' biggest mistake with their electronics unit is using only the factory settings. “They are afraid to push the buttons because there are so many buttons now, and they have independent uses,” Poort says. “They seem to be easily intimidated by the product, but they don’t need to be intimidated.” He suggests if novices think they hit the wrong buttons, they can always tap the restore defaults button, and the unit will return to the factory settings.
Poort recommends a Humminbird Helix 7 (7-inch screen) for the boat's front deck and a Humminbird Helix 9 (9-inch screen) for the boat’s console as suitable units for beginners to install on their boats. Both units feature sonar, down imaging, side imaging, and mapping and can add 360 imaging.
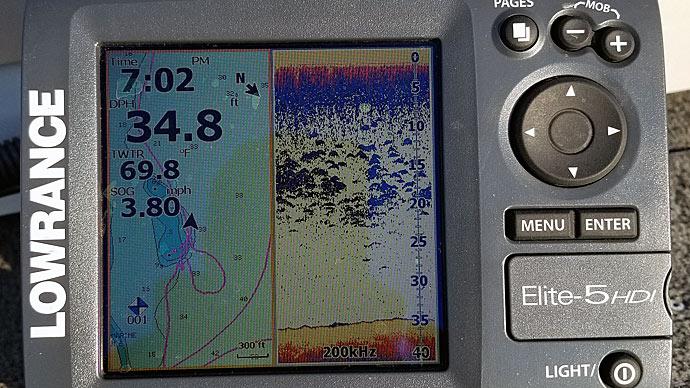
Learning the difference between 2D sonar and down imaging will help novices understand what they are looking at on their screens. Poort suggests sonar shows a cone angle similar to looking at a flashlight beam shining on the floor. So when a boat is in 10 feet of water, you will get 10 feet of coverage area on the depthfinder. If the boat moves out to 20 feet of water, the coverage area expands to 20 feet, and so on.
Poort described down imaging as “a slice of side imaging with very real detail.” He suggests when your boat is in 24 feet of water, the down imaging coverage area is probably 25 feet on each side of the boat. Down imaging also produces a 3D realistic image on the screen, so a brush pile looks more like a brush pile, whereas in the sonar mode, a brush pile appears as a hump on the bottom. You can also see fish shapes with down imaging, whereas sonar shows fish as specks or arches.
When adjusting the settings on 2D sonar, Poort recommends using the dual or wide 83 kHz beam setting for the front deck unit to give you a clearer image for vertical fishing in deep water. He suggests setting the console unit on the narrow 200 kHz beam, which has a faster relay and shows the bottom quicker on the screen for running the boat at high speed.
When setting up side imaging for the front unit, Poort sets the distance at 50 feet, so he has 100 feet of coverage on both sides of the boat. “There is kind of a misconception that side imaging doesn’t work on the trolling motor, and it works fantastic,” Poort says. “You will get a little distortion when you move the motor quickly, but it will come right back to a clean image.” Poort sets the side imaging distance to 100 feet on his console unit to get greater coverage when scouting an area.
Adjusting side imaging sensitivity on the units requires some experimentation. “You can set it on auto while you are learning. However, on auto, you won’t get some of the crisp, clean images you can create by adjusting the sensitivity when you freeze the screen,” Poort says. “If the sensitivity range is zero to 10, you might start at five, look at the color you are using, and make sure the bottom isn’t too dark.”
Today’s units offer multiple split screens, which can confuse some users. Poort recommends that novices use a split screen of side imaging and a navigation chart such as the LakeMaster map for searching areas and marking waypoints when they find specific targets such as brush piles or steep drop-offs. A full screen of side imaging with 100 feet of distance on both sides is best for scouting large areas. Once targets are found, Poort advises trying a split screen with down imaging and sonar for making vertical presentations to the targets.
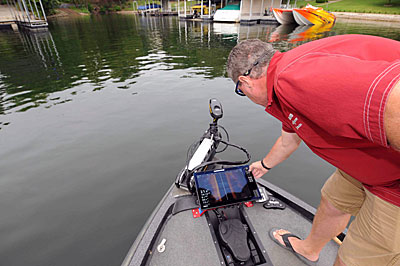
Poort favors hands-on training rather than reading manuals when teaching how to use electronics. “You learn more going out on the water and pressing buttons than sitting there reading because you can actually see what you are doing,” Poort says. He suggests printing out manual sections if you need technical support on specific features.
During your on-the-water training, stick to the curriculum and forget about fishing. “Leave your fishing rods at home if you are trying to learn your sonar,” Poort says. “If you bring a rod, you will want to pick it up. At that point, the fun begins instead of learning. Four hours on the water pressing buttons will do you more good than four hours of picking up a rod and going fishing as for trying to understand what you paid for.”