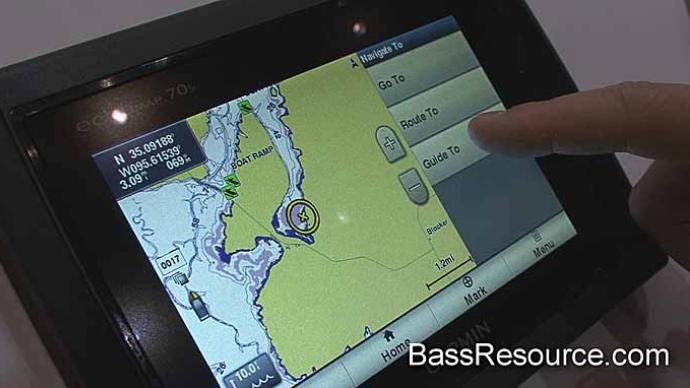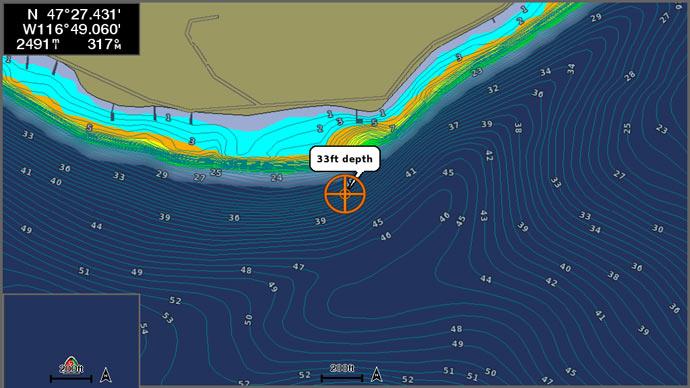
When fishing a new lake, one of the first things I do is head over to the nearest bait and tackle shop and ask for a bathymetric map. A what? A bathy what? A map of the contours of the lake bottom. A ha! Light bulbs go on, the communication gap is bridged. The tackle shop owner hands over a map, I pay and it's off to the lake with a spiffy map in tow.
Have you ever thought of mapping the bottom of your pond? Why? Well for one thing it is darn fun to do and requires very little equipment. And when you're done, you can frame it and hang it up in your den. Or if you love your pond as much as I love mine, your map will be on the living room wall where everyone can see it.
If you want to map the bottom of your pond here's ideas to do it. First, you can hire a pro such as the Cabela's ad in Pond Boss where one of their franchisees uses sophisticated GPS equipment and a special software program. Or, you can do it yourself.
Set aside an afternoon and get some help from a partner: your kids, a buddy or your wife. Side note: If you do this with your wife .... make sure you communicate well. My wife and I are "two bosses." This project requires only one boss ... work this out before you start. Whoever you pick to help ... explain the process before you get started, just as I am explaining it to you now.
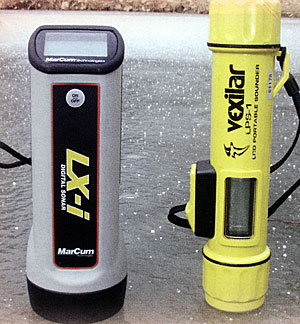
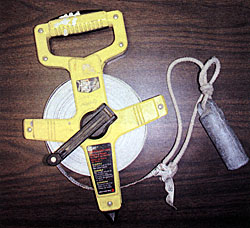
You will need: a tape measure, a depth sounder (a tape measure with a heavy sinker on it) or an electronic one, a bunch of stakes, a pencil and paper, a rope and a compass. A small boat or canoe is necessary if you do this in open water. I like to grid map on the ice and drill holes with an auger to determine depth, but you folks down South are not blessed with hard water. If you do this on ice, you need to drill holes; however some digital depths sounders will "shoot" through clear ice and give you a depth without the drilling. Nice!
Here goes. We are going to lay a grid of a known size over the top of your pond, kind of like a checker board. The squares of this grid will be big if your pond is large and small if your pond tiny. I would not attempt this method of "grid mapping" on a pond larger than 3 acres unless you have more help. A pond that large could be tedious and there are other methods to map larger ponds. For a modest sized pond, let's make those squares 25 feet. I like to lay out my grid on a North/South axis with a compass, although this is not necessary. Pick a corner of the pond to start. Take the tape measure and lay it out along the longest side of the pond and put a stake every 25' along the shore in a straight line. Next, turn the tape measure 90 degrees (use the compass or use a carpenter's square), then lay out a new straight line with the tape measure putting out stakes every 25 feet. These are your baselines and will create a 25 foot grid. A smaller grid (like a 10' interval) will lead to a more detailed map but the trade-off is increased work. The decision is yours! I like to label one baseline with numbers and the other with letters. This will allow you to give each depth reading a letter/number combination ... like A 1. Make a rough sketch of the pond and the baselines.
Next, take a long rope and stretch it acros the pond at your first set of stakes (probably the 25' mark). Put the boat in the water and use the rope to pull yourself along until you can look on the opposite shore and are lined up with the 25' stake on the other baseline. Remember a boat is not necessary if you do this on the ice. We are making the checker board, one row at a time. If you want to get fancy you can use two ropes, one running each way on the checker board. If you are on the ice, start drilling holes where the ropes intersect (or tape measures intersect on an interval of 25'). At the intersection of the square (or hole in the ice) record the depth with your home-made or digital depth sounder. The digital hand held sonar depth finders like the one pictured record the depth instantly. If you use the boat it's easier to do this with two people, one to pull the boat along, and the other to do the depth. Write down the depth along with the appropriate grid letter/number combination that puts you in the correct place on the pond. Repeat until the entire row is done. Then move over to the next row making sure you keep to the grid. Repeat the process until the grid is done. I would round your depths to the nearest foot. What about the shoreline? From the perimeter letter/number (or hole on the ice) take your tape measure and record the distance from that row to shore. Every perimeter reading should have a distance to shore measurement.
So how does this make a map? You don't have a map in your hand, yet.... you have a bunch of measurements that will be used to make the map. Next, head out to an office supply store or an art shop and buy 2 or 3 sheets of vellum or other large map making paper. This usually comes in 2' X 3' sheet. Buy 2 or 3 sheets in case you screw up the first time or two. A good mechanical pencil and an eraser are also must have items. While you are there, find a nice frame to put your map on the wall above the mantle when you are finished.
Go home and unroll the paper on the kitchen table and gently tape down the edges. Establish a map scale. For small ponds, 1"=10' is a good one. That means one inch on your map on the kitchen table equals 10 feet on your pond in the field. So your squares on the map will have 2.5" sides. Get out a yardstick or ruler and make tick marks every 1.5 inches (if you used 25 feet in the field) up each side of the paper and connect the tick narks with straight, light lines to create your checker board. You will have a whole paper full of evenly spaced 2.5" squares. Assign letters to one side and numbers to the other side. Make sure the pond will be in the center of the paper by making the center "field" number/letter the center number/letter on the map. In other words, start in the middle of the vellum and work out toward the edges. This is to avoid drawing the entire pond in the lower left hand corner of the paper by insisting that A1 must start in the lower left corner.
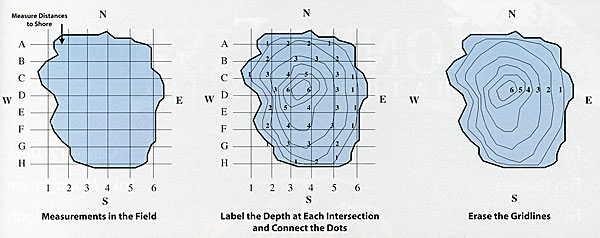
Go to each letter/number reading and put he depth of that reading right on the map. write it lightly, you'll erase it later. Fill in all the depths for every reading. Remember those distances to shore? Well this is the time to bring them out to draw in the shoreline. Along the line (in the proper direction) measure out with a ruler the appropriate listance on the map to shore. Remember your map scale, one inch equals 10 feet in the field. So what if you have a distance to shore of 17 feet measured on the pond? That would be 1.7 inches on the map. I think 13/4 or 1.75 inches is close enough for your map measurement. Don't you? Want to be more accurate... go ahead!
What next? Connect the dots for the shoreline and the perimeter of your pond. Then connect lines of equal depth, some interpretation and imagination is required. Remember rounding the depths to the nearest foot? Your contour lines are going to be in feet and there may be a gap between readings. For example D4 may be 6 feet deep and D5 may be 3 feet deep (see example). You will have a 4' and a 5' contour line between those two readings. My dad would say this is "winging it." I say it's interpolation.
At this point, you can also determine the acreage of the pond by counting the number of squares and partial squares that hit the pond. If you used a 25 foot grid, your map squares are 2.5" X 2.5" (25' X 25' on the actual pond) or 625 ft2. Simply add up the number of squares you have and multiply by the square footage of one square. Divide by 43,560 ft2 (number of square feet in an acre) to yield the acreage of the pond. If you want to get fancy, you can even determine the volume of water at each depth in the pond by doing this method with each contour line. Determine the volume of the pond (in acre feet), by adding up all of the depth layers. One acre/foot of water is 43,560 ft' or 325,872 gallons. Who cares how much water is in the pond? In my pond ... ME! I want trout in my pond. Trout like it cold. Consequently, in New York at 1000 feet in elevation, 1/3 of the volume of my pond should be greater than 10 feet deep.
Viola! Done. Add a few nice touches like a dock or vegetation and erase your lines. Some folks like to make their maps ornate and color the bathymetric (sorry) lines. Go ahead, go crazy and have fun with it. Ask if the kids can map the pond for a science project or a scout project. Above all hang it on the wall to enjoy! You are now the pond DaVinci! I guarantee every visitor with a pond pulse entering your home will notice that map and will make a comment. Bring that pond inside! My map is going over the sofa.
Mark Cornwell is a fisheries professor at SUNY-Cobleskill in Cohleskill, New York. His passion is raising walleye and the I.Q. of fisheries students in the Northeast.
Reprinted with permission from Pond Boss Magazine
