| Total Costs | |
| Boat | $200 (very used) |
| Motor | $700 (used) |
| Trailer | $500 (new) |
| Electronics | $150 (new) |
| Trolling Motor | $100 (new) |
| Trolling Motor Mount | $30 (new) |
| Plywood | $20 |
| Polyester Resin | $10 (1 qt) |
| Contact Cement | $5 (1 qt) |
| Carpeting | $50 |
| Paint | $20 |
| Seats | $80 |
| Pedastal Mount | $10 |
| Total Cost | $1875 |
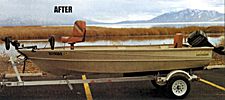
We finally finished the boat project and are thrilled with the results.
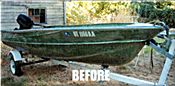
If you remember, we started with an old 14-foot aluminum V-bottom and started making it a practical fishing boat for small waters and beginning anglers who didn't want to spend much money on a boat. It would also make a great second boat for fishing in those places that could be hazardous to your gel coat.
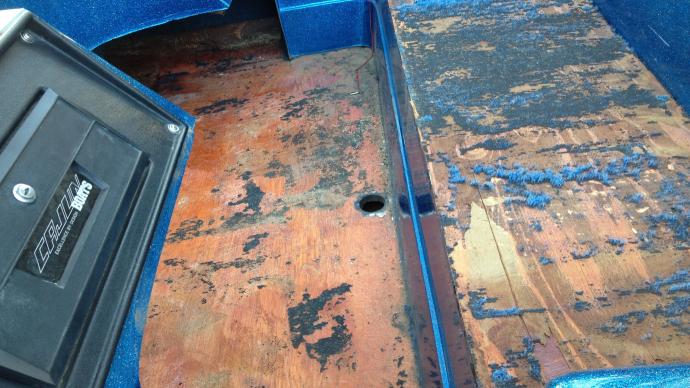
We started with a boat we found at the famous Kelsey Bass Ranch. This boat had been used on the private lake for years. It wasn't the prettiest boat around, but it served our purposes. The boat had been painted green, most of which had been chipped off over the years.
I strapped the boat to the top of my camper, and my friend Lisa immediately started calling me Jethro. It did look a little odd.
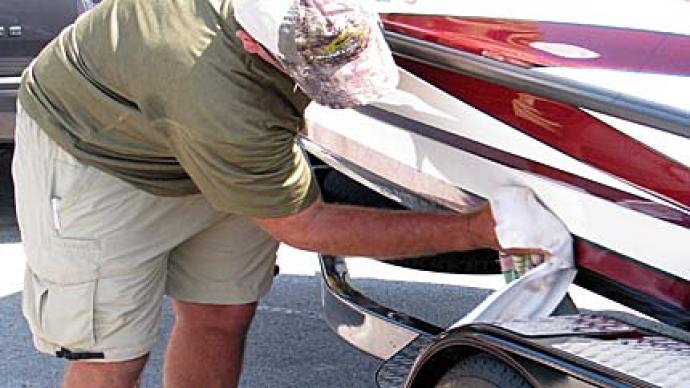
Once at home, we began stripping off the old paint and placing orders. First, we ordered a new trailer from Cabela's. It has worked out famously. Then we purchased a 9.8-horsepower Mercury outboard from Brent Halstrom of Halstrom Marine in American Fork, Utah, to power the craft.
Stripping the paint was a long process. Then we started looking for any location where the boat might leak, and using liquid solder, we sealed up any leaks. After sealing the leaks, we sanded all the hardened liquid solder smooth and began choosing the colors.

It's incredible what can direct your choices of colors. We went to Sportsman's Warehouse in Provo, Utah, looking for seats. The only ones they had available had tan and brown stripes on them. Fine, we purchased tan paint for the hull and interior. After painting the boat, then came the more difficult part of making a deck.
We purchased a sheet of 3/4-inch CDX plywood and then stopped and stared for a long time. Looking at the boat's shape, we wondered how we would cut the wood to fit inside the V-bottom. Finally, a lesson from art class saved the day. We marked the wood in a 6-inch grid with a center mark. Then, we placed a board right down the center of the boat at the height of the deck and marked it in 6-inch lengths. Every 6 inches, we would measure the boat's width and transfer that measurement to the plywood's grid.
This gave a relatively accurate template of the shape of the boat. Amazingly, the deck slipped firmly into place when the final cut was done.
One tip is to leave about a 1/4-inch short all around to allow the carpeting to fit.
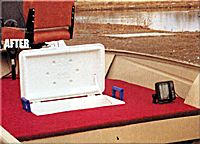
After the deck was cut, we then located a spot behind where the pedestal seat would be and measured our ice chest. We marked the deck and cut a hole big enough to slide an ice chest into it. This idea came from a photo we saw of another boat. In the picture, someone from Saint George, Utah, had cut a place into the deck of his Jon Boat to put his ice chest. We thought this was a grand idea. The ice chest is still removable, and with a portable aerator, it can also be used as a livewell.
Support legs were cut to add strength to the deck, and then the deck was removed. We coated the deck, above and below, with a polyester resin to protect the wood from moisture. Once the deck had dried, we left the deck standing on its supports to prepare it for carpeting.
We located a roll of rust-colored carpeting, which would go well with the tan paint and the seats. We laid it out well. When underway, you are seated lower in the boat for safety, and it allows you easier access to the tiller motor without leaning down. We also placed the rear seat to one side to allow easier access to the tiller handle and to help balance the weight from the gas tank on the port side.
When the pedestal seat was attached to the deck, we placed the deck back into the boat and finished cutting a hole in the carpet where the ice chest would go.
A boat of this size and weight doesn't need an 80-pound thrust trolling motor. After carefully considering our budget, we decided to purchase a MotorGuide 34-pound thrust tiller-type trolling motor. The problem with this was how to mount the motor.
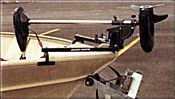
We found that MinnKota makes the perfect solution to this problem. They have a mount that screws onto the bow and a lanyard that ties to the bow, creating firm support for a tiller-style trolling motor. It attaches in seconds, is very solid, looks good, and still allows you to tilt the motor. For only $30, it was the answer to our dilemma.
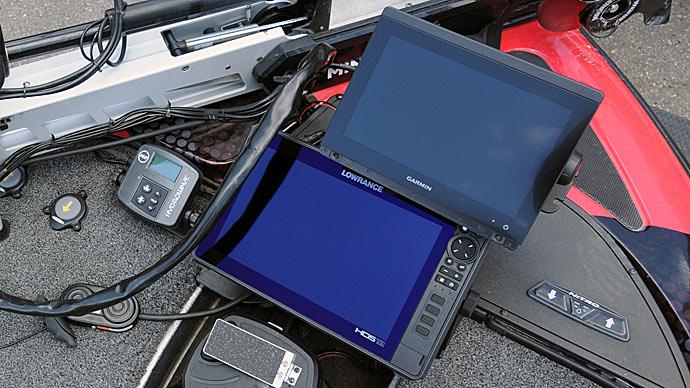
And last but not least, we drilled holes in the transom and mounted the transducer for the Eagle FishEasy graph. For a small boat, this is the way to go; it's inexpensive, small, and loaded with features.
This has been a fun project, and we ended up with a great little fishing machine for under $2,000.
Return to Build A Bass Boat Part 1
Return to Build A Bass Boat Part 2
Reprinted with permission from Bass West Magazine